ListView is one of the most common widgets in Flutter. Sometimes, we will need to scroll the list view to top or bottom of it in our code (programmatically). In this post, I will show you how to do that through an example.
1. Create a simple list with 2 buttons
import 'package:flutter/material.dart';
void main() => runApp(App());
class App extends StatelessWidget {
@override
Widget build(BuildContext context) {
return MaterialApp(
title: 'App',
theme: ThemeData(
primarySwatch: Colors.blue,
),
home: HomePage(),
);
}
}
class HomePage extends StatelessWidget {
@override
Widget build(BuildContext context) {
return Scaffold(
appBar: AppBar(
title: Text('Coflutter'),
),
body: Column(
children: [
Row(
mainAxisAlignment: MainAxisAlignment.spaceAround,
children: [
RaisedButton(child: Text('To Top'), onPressed: () {},),
RaisedButton(child: Text('To Bottom'), onPressed: () {},),
],
),
Expanded(
child: ListView.builder(
controller: _scrollController,
itemCount: 20,
itemBuilder: (BuildContext context, int index) {
return Container(
height: 100,
width: double.infinity,
color: index % 2 == 0 ? Colors.red : Colors.green,
);
},
),
),
],
)
);
}
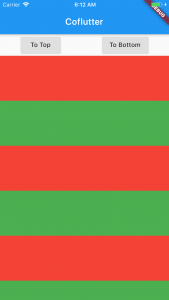
}I have just created a simple list with red and green containers. I made a fixed number of item (20), it is big enough to have the scroll. There are 2 buttons on top of screen for scrolling the list later.
2. Create a Controller and attach it to the listview
class HomePage extends StatelessWidget {
  // New code
  final ScrollController _scrollController = ScrollController();

  @override
  Widget build(BuildContext context) {
    // ... Other code
        child: ListView.builder(
          // New code
          controller: _scrollController,
          itemCount: 20,
          // ... Other code
        );
  }
}
3. Implement onPressed on 2 buttons to scroll the list view
// ... Other code

Row(
  mainAxisAlignment: MainAxisAlignment.spaceAround,
  children: [
    RaisedButton(
      child: Text('To Top'),
      onPressed: () {
        // Delay to make sure the frames are rendered properly
        await Future.delayed(const Duration(milliseconds: 300));
        SchedulerBinding.instance?.addPostFrameCallback((_) {
           _scrollController.animateTo(
           _scrollController.position.minScrollExtent,
           duration: const Duration(milliseconds: 400),
           curve: Curves.fastOutSlowIn);
        });
  },),
  RaisedButton(
    child: Text('To Bottom'),
    onPressed: () {
      // Delay to make sure the frames are rendered properly
      await Future.delayed(const Duration(milliseconds: 300));
      SchedulerBinding.instance?.addPostFrameCallback((_) {
      _scrollController.animateTo(
        _scrollController.position.maxScrollExtent,
        duration: Duration(milliseconds: 500),
        curve: Curves.fastOutSlowIn);
      });
 },),
],),
// ... Other code
Here is the result:
You can find the full source code for this demo on Github.

Creator of Coflutter.
Founder & CTO at Bumbii Technology
Founder at Bumbii K12
Follow him on Twitter, Github, StackOverflow, LinkedIn, Upwork.
Hi,
you have used maxScrollExtent for both the buttons.